Upgrading your Social Champ account will give you access to advanced features and allow you to manage more social media accounts efficiently. Follow these steps to easily upgrade your plan.
1. Log In to Social Champ
- Open Social Champ in your web browser.
- Log in with your email and password.
2. Access Billing Settings
- Once logged in, locate your profile icon in the top-right corner of the dashboard.
- Click on the profile icon, and then select Billing Settings from the drop-down menu.
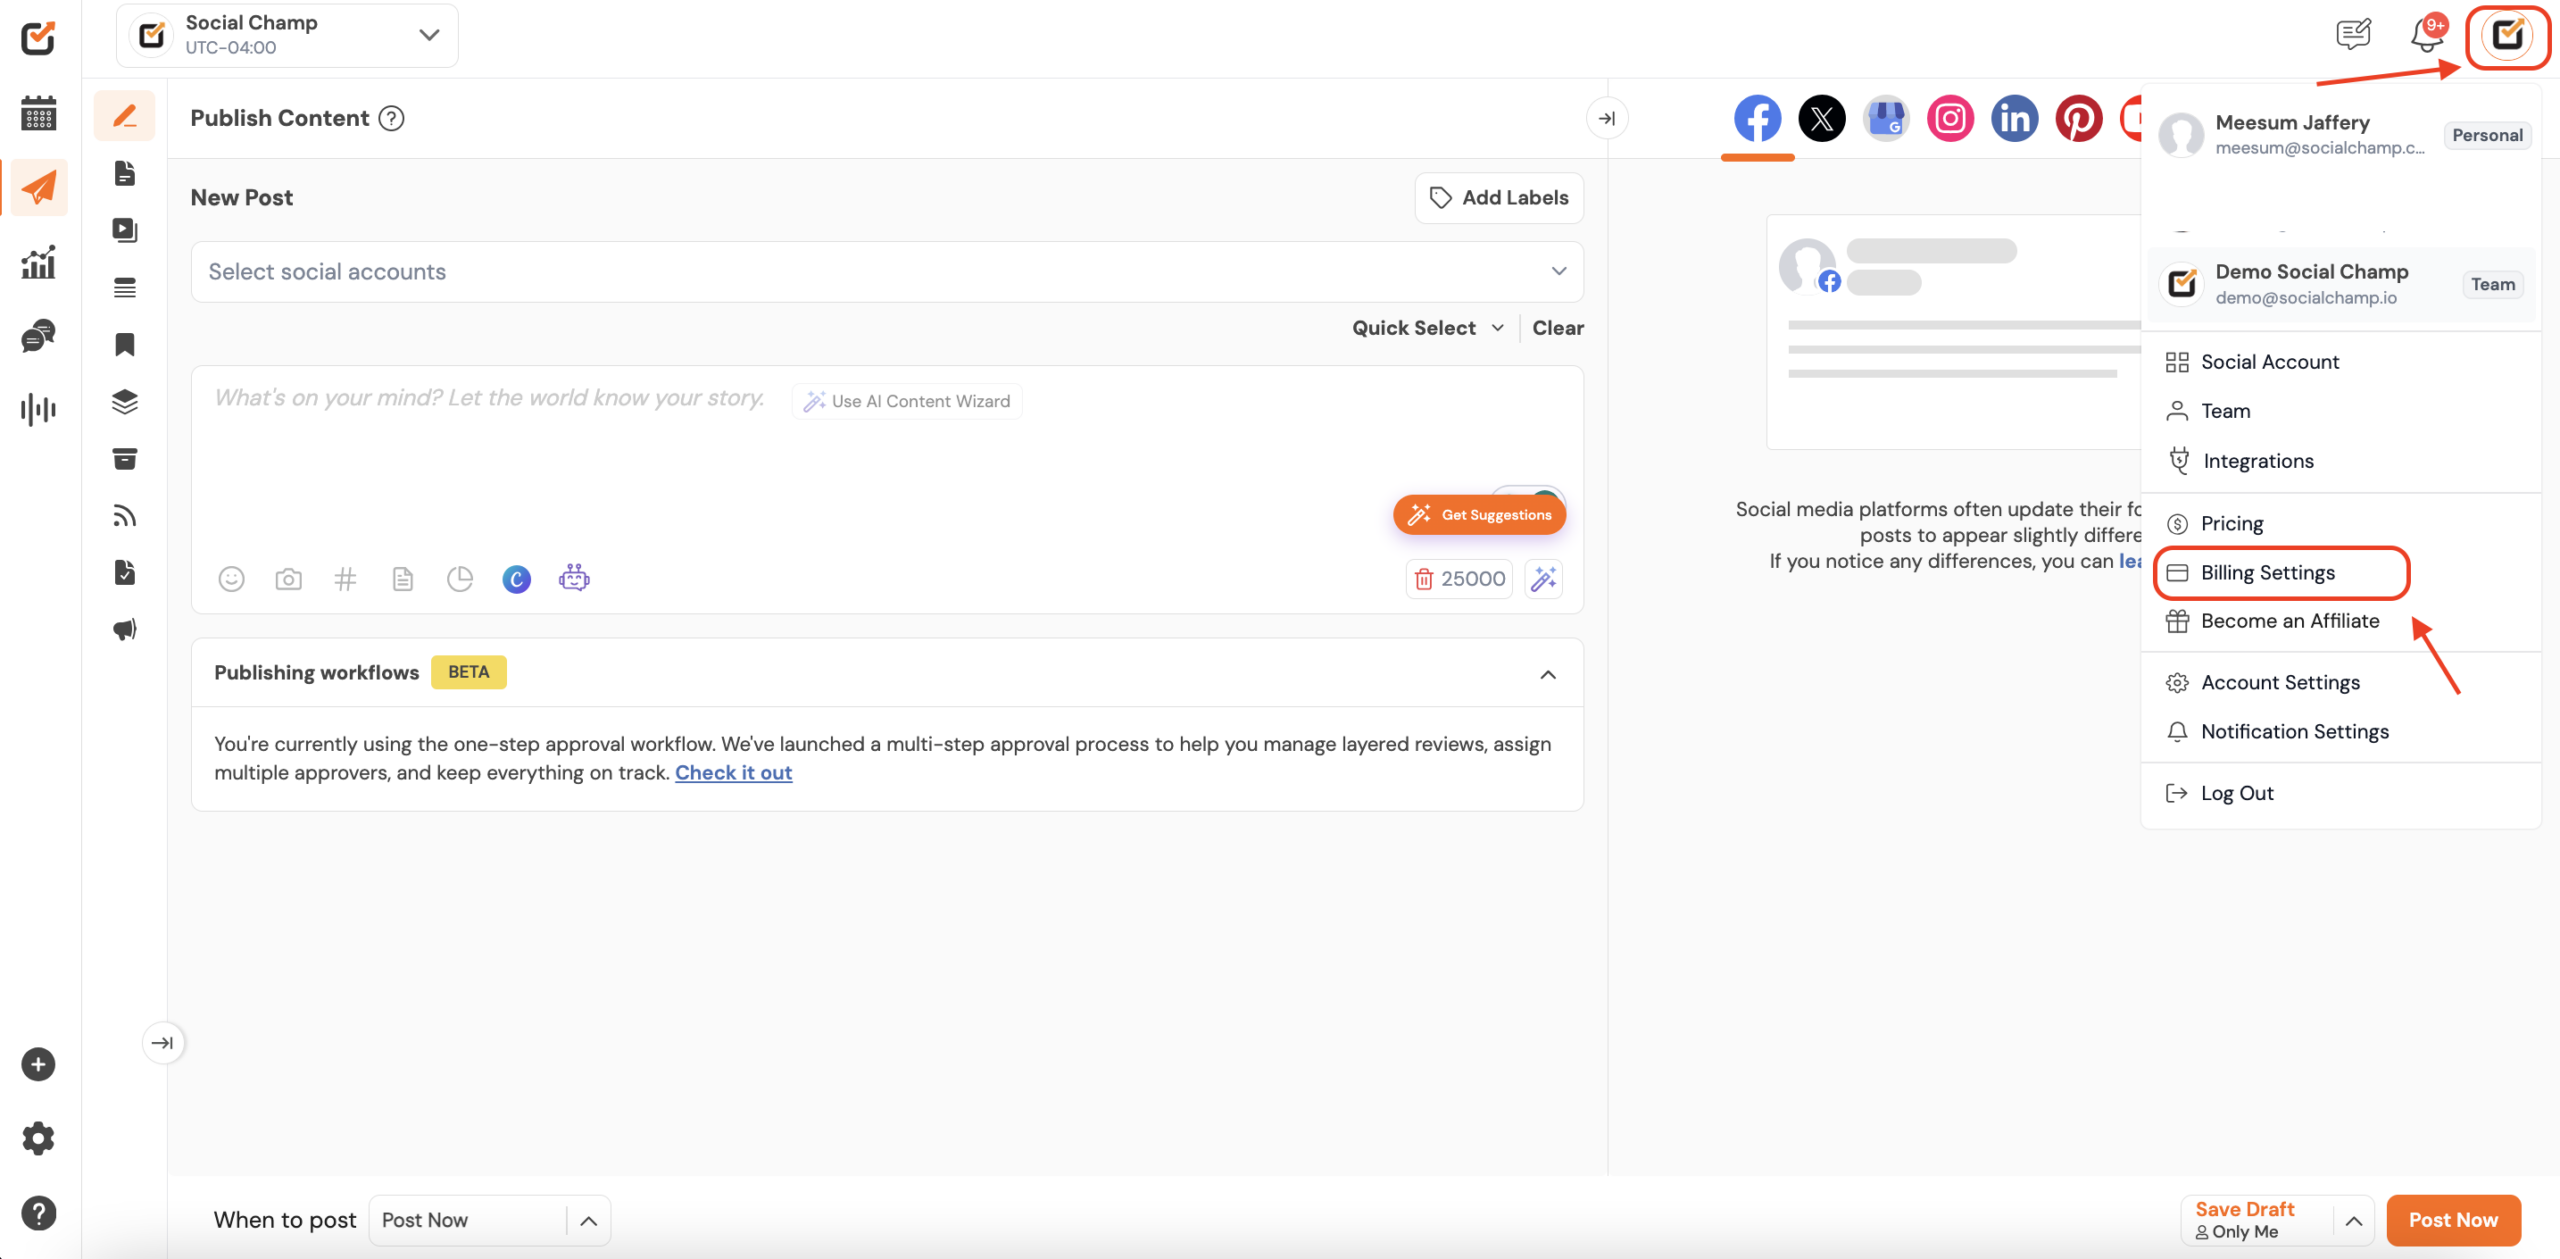 How to upgrade your account on Social Champ
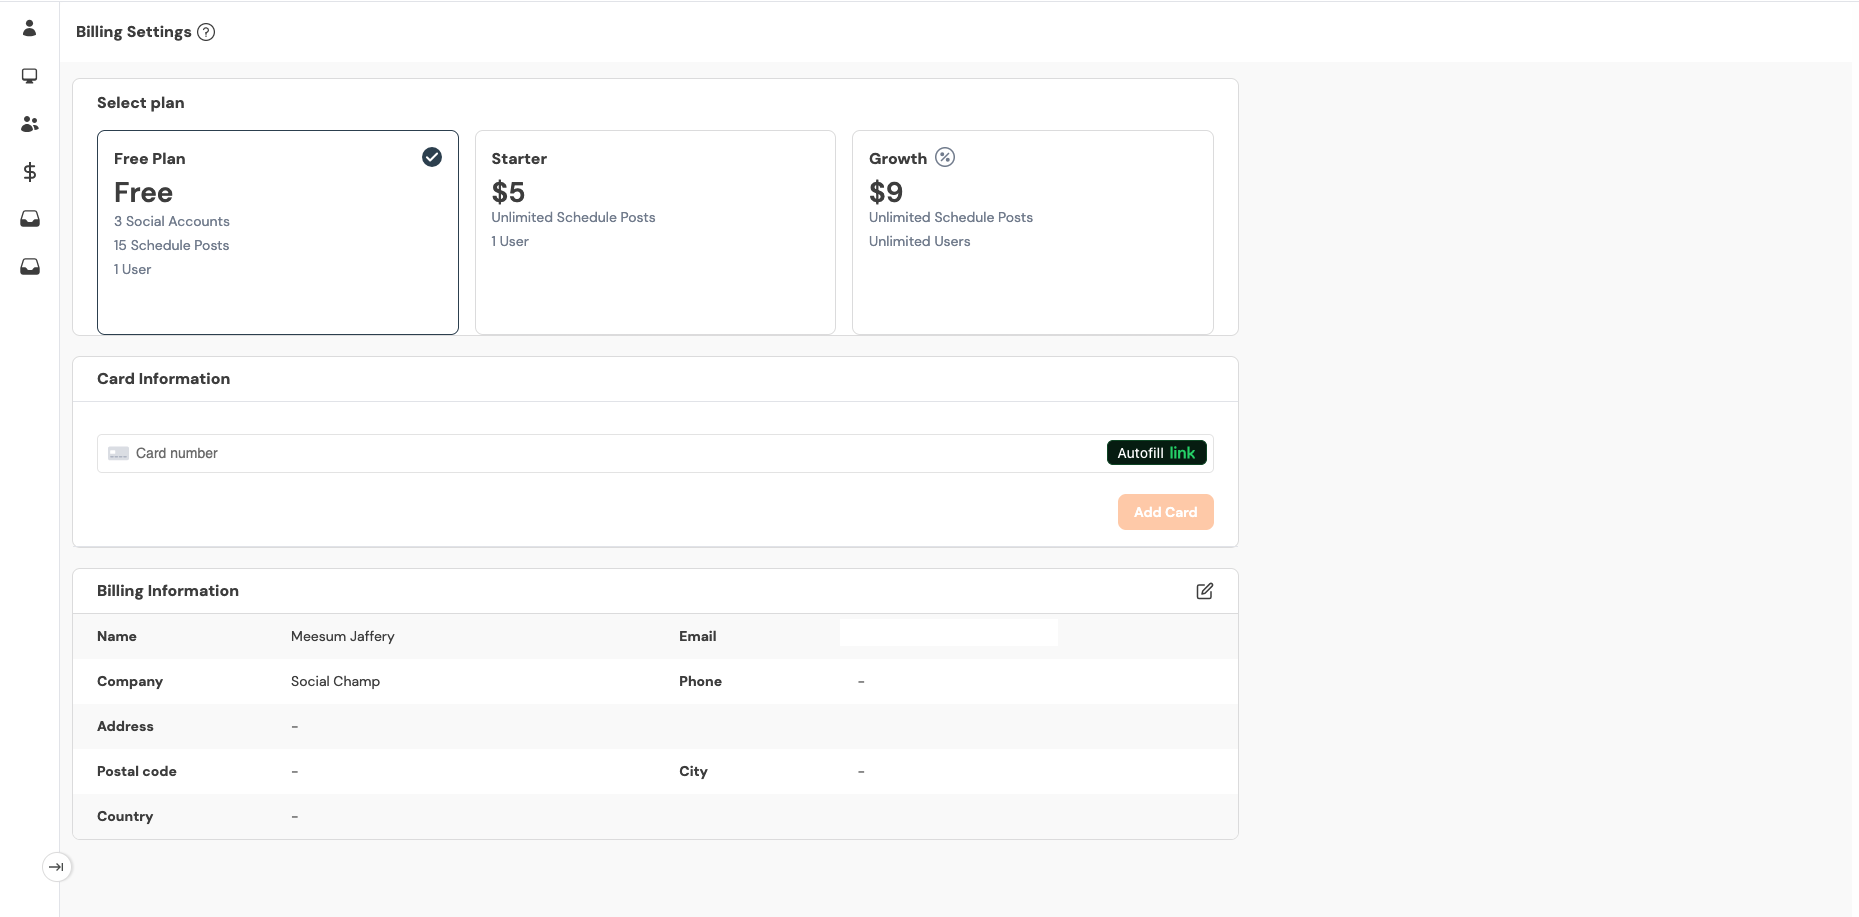
3. Review Available Plans
- In the Billing Settings, click “Change Plan” to view the available upgrade options. Here’s a summary of the current plans (pricing is now based per social account):
| Plan | Price | Users | Workspaces | Key Features |
|---|---|---|---|---|
| Free | $0 | 1 User | 3 Social Accounts | • 15 scheduled posts per account • Basic analytics • 1 Workspace |
| Starter | $5 / profile | 1 User | 1 Workspace | • Unlimited post scheduling • Social Inbox • Ad Boost • Analytics • Email & Chat Support |
| Growth | $9 / profile | Unlimited Users | Unlimited Workspaces | • All Starter features, plus: – Advanced analytics – Priority support – Social listening – Competitor analysis – Client management – Post approval system |
| Enterprise | Custom Pricing | Unlimited Users | Unlimited Workspaces | • All Growth features, plus: – API access – Custom integrations – Dedicated support – SSO, and more |
- For each plan, you’ll have the option to Select Plan if you’d like to upgrade.
- You can also check the full details on our pricing page.
4. Choose Billing Frequency
Under the Order Summary section, you can choose between monthly or yearly billing:
- Monthly: Regular monthly charge based on your selected plan.
- Yearly: Receive a 10% discount if you choose to be billed annually.
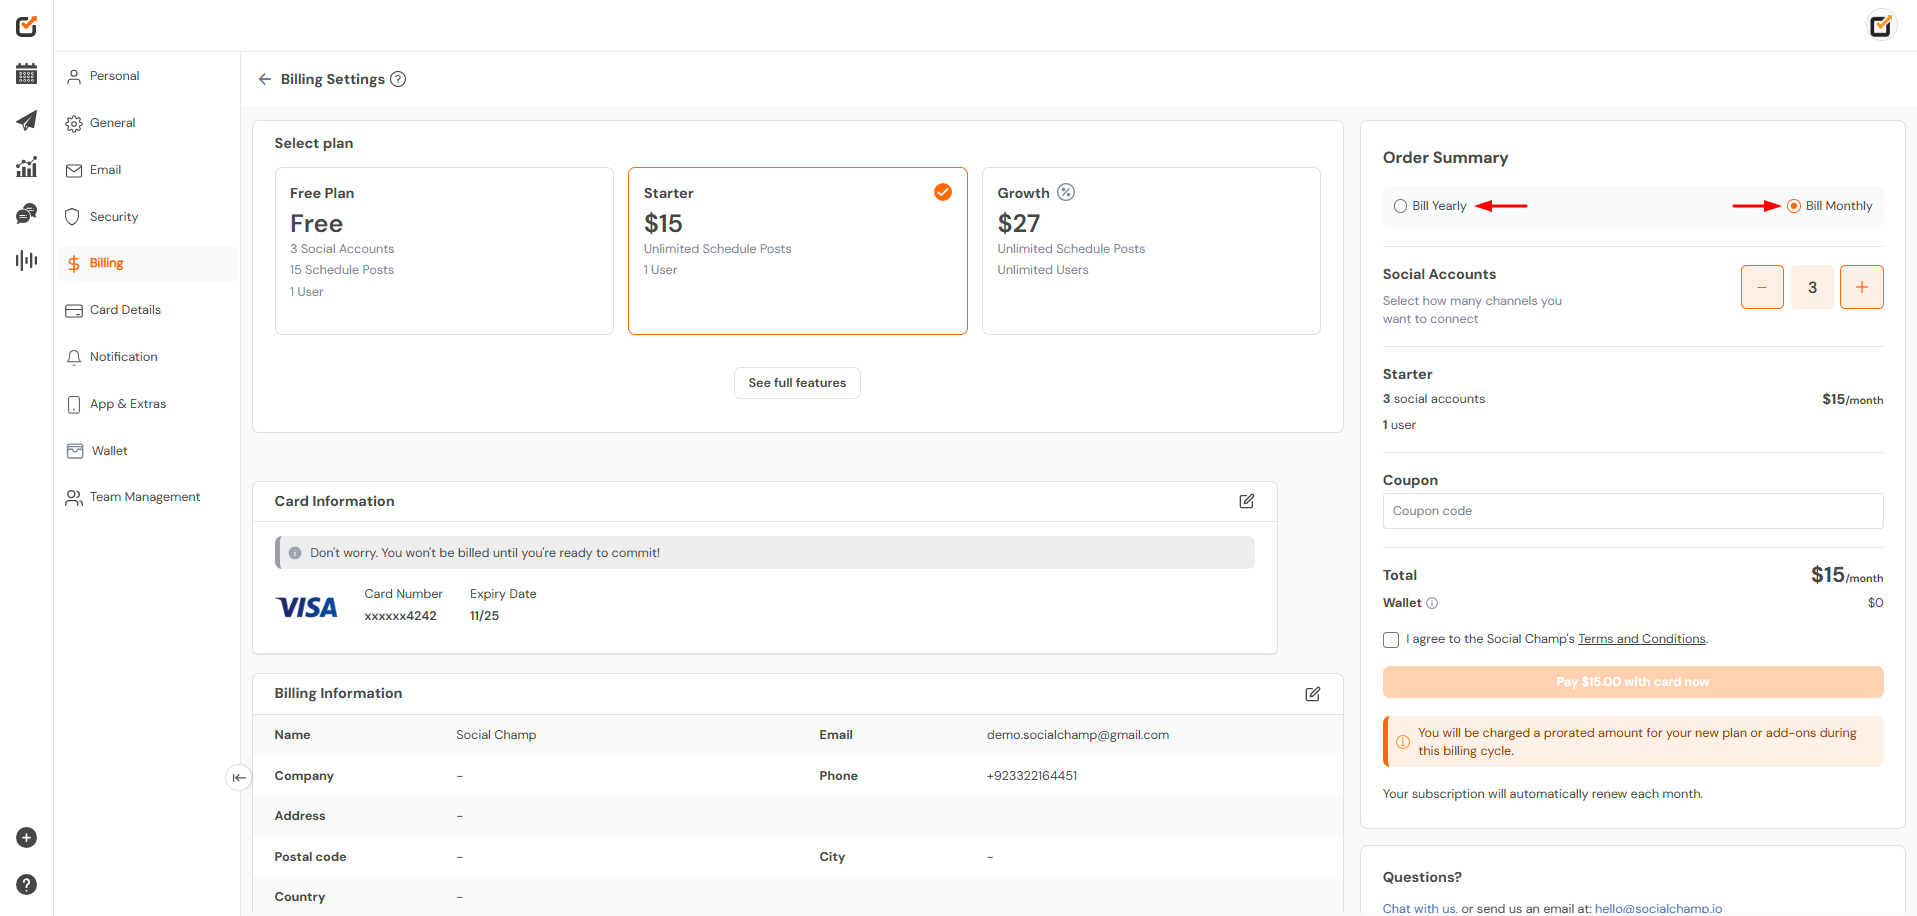
5. Enter Payment Information
- Fill in the required Card Information. Note that you won’t be billed until you confirm.
- Check your Billing Information (Name, Email, Company, etc.) to ensure it’s correct.
6. Apply Any Coupon Code (If Available)
- If you have a coupon code, enter it in the Coupon Code field under Order Summary and click Apply to see your updated total.
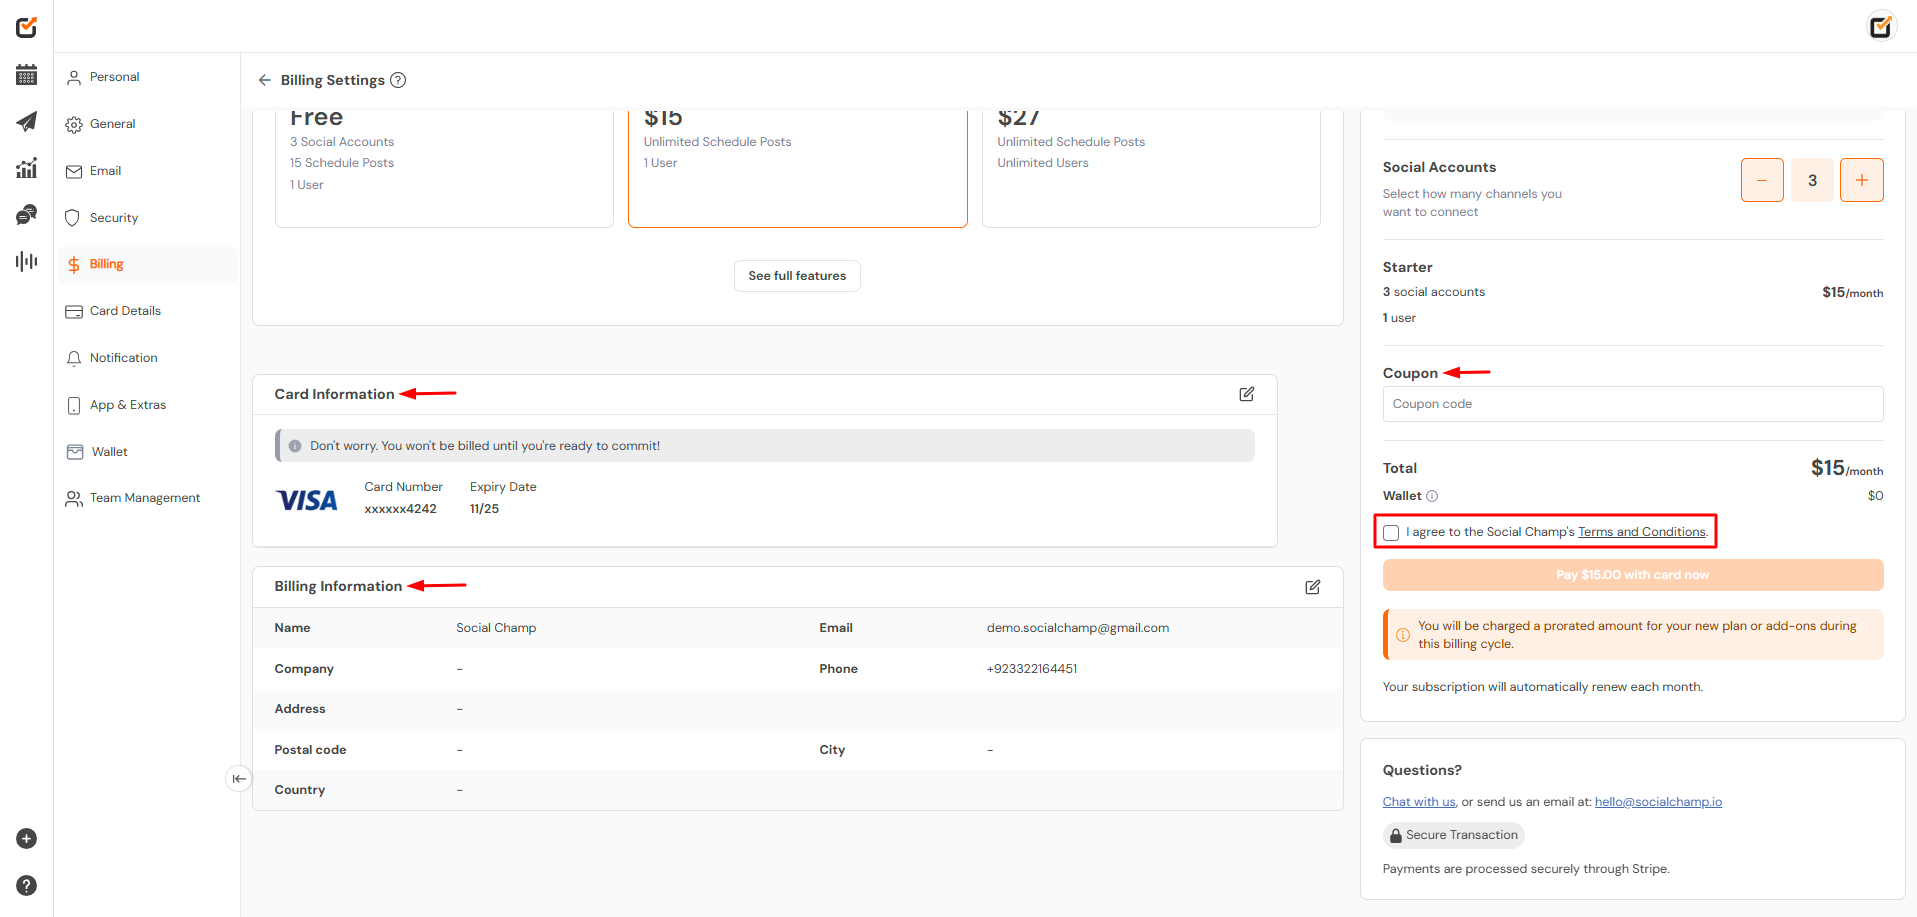
7. Review and Confirm
- Review the Order Summary to confirm the plan, billing frequency, and any add-ons.
- Check the box to agree to Social Champ’s Terms and Conditions.
- Click Pay $[Amount] with card now to complete your upgrade.
Additional Information:
- Automatic Renewal: Your subscription will renew automatically each month (or year if you chose yearly billing).
- Billing Support: For any questions or issues, contact our support team at support@socialchamp.com.
Introduction to Social Champ Welcome to Social Champ! We're excited to have you on board. This guide will walk you Read more
Unlock the full power of Social Champ with our 7-day free trial! Take advantage of unrestricted access to all premium Read more
Moving to Social Champ is more than just a transition—it’s a bold step toward empowering your social media management! Designed Read more
Social Champ uses a simple, transparent per-profile pricing model. Our flexible pricing scales down in cost as your social media Read more